Sign
eYssen Sign allows you to send, sign, and approve documents online using electronic signatures. It provides a complete document signing solution with PDF template management, a drag-and-drop field editor, multi-party signing workflows, two-factor authentication, a full audit trail, and integrations with sales, invoicing, and HR.
An electronic signature shows a person’s agreement to the content of a document. Just like a handwritten signature, the electronic one represents a legal binding by the terms of the signed document.
Validity of electronic signatures
Documents signed via the Sign app are valid electronic signatures in the European Union and the United States of America. They also meet the requirements for electronic signatures in most countries. The legal validity of electronic signatures generated by eYssen Sign depends on your country’s legislation. Companies doing business abroad should also consider other countries’ electronic signature laws.
Important
The information below has no legal value; it is only provided for general informational purposes. As laws governing electronic signatures rapidly evolve, we cannot guarantee that all information is up-to-date. We advise contacting a local attorney for legal advice regarding electronic signature compliance and validity.
European Union
The eIDAS regulation establishes the framework for electronic signatures in the 27 member states of the European Union. It distinguishes three types of electronic signatures:
Simple electronic signatures
Advanced electronic signatures
Qualified electronic signatures
eYssen Sign generates the first type, simple electronic signatures; these signatures are legally valid in the EU, as stated in the eIDAS regulation.
Electronic signatures may not be automatically recognized as valid. You may need to bring supporting evidence of a signature’s validity. The Sign app automatically collects supporting evidence during the signing process, such as:
Email and SMS verification (if enabled)
Timestamped, IP-tracked, and geographically traceable access logs to the documents and their associated signatures
Document traceability and inalterability (any alteration made to a signed document is detected using cryptographic hash chains)
United States of America
The ESIGN Act (Electronic Signatures in Global and National Commerce Act), at the interstate and international levels, and the UETA (Uniform Electronic Transactions Act), at the state level, provide the legal framework for electronic signatures.
Overall, to be recognized as valid, electronic signatures have to meet five criteria:
The signer must show a clear intent to sign. For example, using a mouse to draw a signature can show intent. The signer must also have the option to opt out of the electronic document.
The signer must first express or imply their consent to conduct business electronically.
The signature must be clearly attributed. In eYssen Sign, metadata such as the signer’s IP address and geolocation is added to the signature, which can be used as supporting evidence.
The signature must be associated with the signed document, for example, by keeping a record detailing how the signature was captured.
Electronically signed documents need to be retained and stored by all parties involved; for example, by providing the signer either a fully-executed copy or the possibility to download a copy.
Dashboard
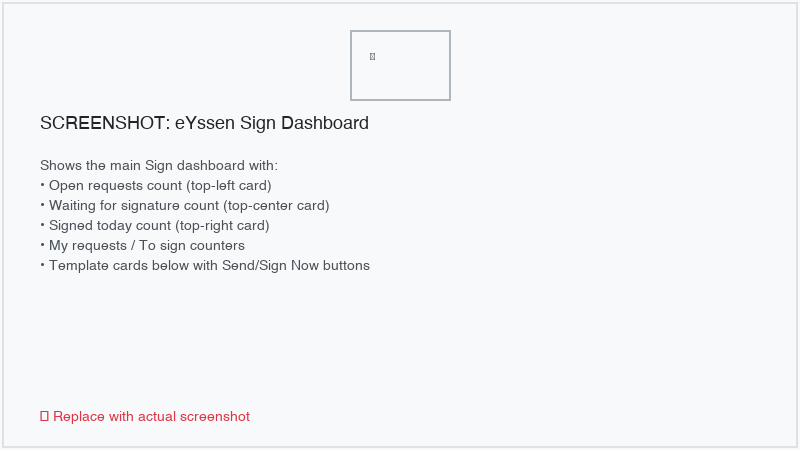
The Sign dashboard is the first screen displayed when you open the app. It is built as an OWL component and provides an at-a-glance overview of your signing activity along with quick access to your templates.
Statistics
At the top of the dashboard, a set of counters displays real-time signing metrics:
Open Requests: total number of signing requests that are still in progress (state Sent).
Waiting for Others: requests where you are not a pending signer but other participants have not yet signed.
Signed Today: number of requests that reached the Signed state today.
My Requests: requests you created.
To Sign: requests where you are a pending signer.
Template cards
Below the statistics, your templates are displayed as cards. Each card shows the template name, category, and tags. Two action buttons are available on each card:
Send: opens the send wizard to create a new signing request from this template and assign signers to the defined roles.
Sign Now: starts a signing session immediately where you, as the current user, fill in all roles yourself. This is useful for internal documents that only require one signature.
You can star or unstar templates to mark them as favorites. Favorite templates are shown first on the dashboard.
Templates
Templates are reusable PDF documents with pre-configured signing fields. Go to to view, create, and manage your templates.
Creating a template
To create a new template:
Click Upload a PDF Template from the dashboard, or go to and click New.
Select a PDF file from your computer.
The template editor opens, allowing you to place signing fields on the document.
Template editor
The template editor provides a visual, drag-and-drop interface for placing fields onto the pages of your PDF document.
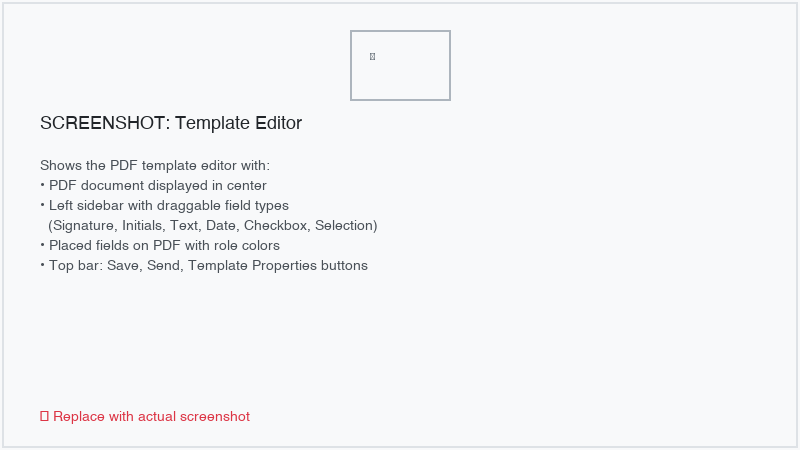
The left sidebar lists all available field types. Drag a field from the sidebar and drop it onto the desired location on the PDF. Once placed, you can:
Resize the field by dragging its corners.
Move the field to a different position on the page.
Change the role assigned to the field by clicking on it and selecting a different role from the dropdown.
Mark as required to force signers to fill in the field before completing their signature.
Delete the field by selecting it and pressing the delete key or clicking the trash icon.
Each field is color-coded according to the role it is assigned to, making it easy to see which signer is responsible for which fields.
Tip
Use the page navigation controls at the bottom of the editor to move between pages of a multi-page PDF document.
PDF rotation
If your PDF pages are not oriented correctly, you can rotate them directly in the template editor. Click the rotation button in the toolbar to rotate the current page by 90 degrees.
Template properties
Click Template Properties in the template editor to configure additional settings.
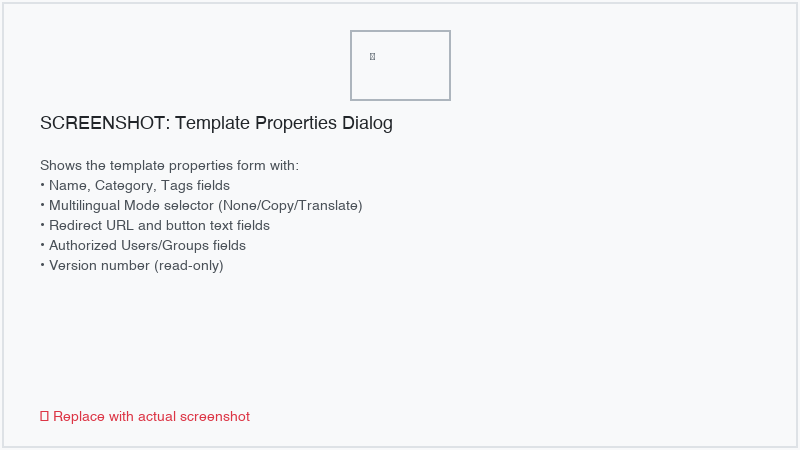
The following properties are available:
Name: the display name of the template.
Category: assign a category for organizational purposes.
Tags: add one or more tags for filtering and searching.
Redirect URL: a URL the signer is redirected to after completing their signature. This link also appears in the signature confirmation email.
Authorized Users: restrict which users can use this template. Leave empty to allow all Sign users.
Authorized Groups: restrict template access to members of specific security groups.
Version management
eYssen Sign tracks template versions automatically. When you need to update a template (for example, to change the PDF or modify field placement), you can create a new version instead of editing the current one. This preserves the integrity of existing signing requests that reference earlier versions.
To create a new version:
Open the template and click Create New Version.
Upload the updated PDF or make changes to the field layout.
Save the new version. The previous version is automatically archived.
Existing signing requests continue to reference the version of the template that was current when they were created.
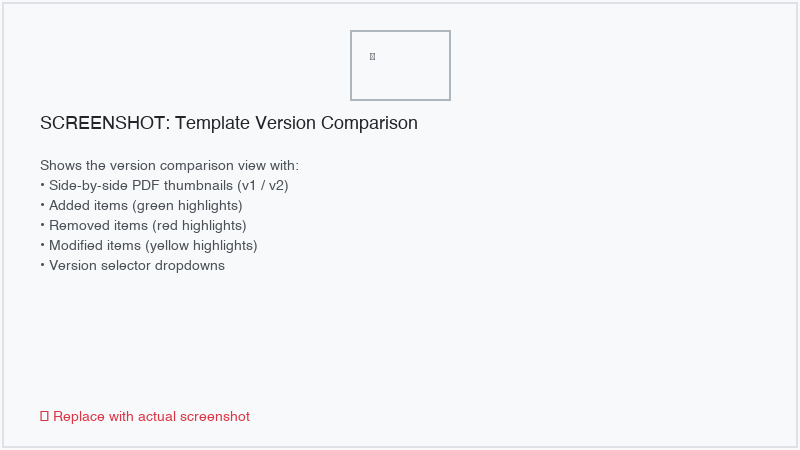
Version comparison
You can compare two versions of a template side by side to see what changed. Open a template and click Compare Versions. The comparison view highlights:
Added fields: fields present in the new version but not in the old one (shown in green).
Removed fields: fields present in the old version but not in the new one (shown in red).
Modified fields: fields whose position, size, or properties changed between versions (shown in yellow).
Multilingual support
eYssen Sign supports two approaches for handling documents in multiple languages:
Mode A: Template Copy per Language
Create a separate PDF document for each language. Each copy is linked to the parent template and associated with a specific language. When sending a request, the system selects the appropriate language copy based on the recipient’s preferred language.
To set up:
Open the template and set Multilingual Mode to Template Copy per Language.
Create child template copies for each language by clicking Create Language Copy.
Upload the localized PDF and configure the fields for each copy.
Mode B: Dynamic Field Translation
Use Odoo’s built-in translation system to translate field default values and placeholder text. The PDF itself remains the same, but text fields are populated in the signer’s language.
To set up:
Open the template and set Multilingual Mode to Dynamic Field Translation.
Switch to the desired language using the language selector and translate the default values of text fields.
Note
Mode B works best for templates where the PDF content is language-neutral (e.g., forms with labeled boxes) and only the field values need translation.
Favorites
Star a template to mark it as a favorite. Favorite templates appear first on the dashboard. Click the star icon on a template card or inside the template form view to toggle the favorite status.
Share link
Generate a public URL that allows anyone to sign a document without requiring an Odoo account.
To generate a share link:
Open the template.
Click Share.
Copy the generated URL and distribute it via email, chat, or any other channel.
When someone opens the link, they can fill in their details and sign the document. A new signing request is automatically created for each person who signs via the shared link.
Note
Share links can be deactivated at any time by clicking Disable Link on the template.
Roles
Each field in a Sign document is assigned to a role that corresponds to a specific signer. When a document is sent for signing, each role is mapped to a person who must fill in the fields assigned to their role.
Roles are managed at .
You can create new roles or edit existing ones. Each role has:
Role Name: a descriptive name (e.g., Customer, Employee, Witness).
Color: a color used to visually distinguish fields belonging to this role in the template editor.
Sequence: determines the default order when multiple roles exist.
Field types
Fields define the type of information signers must provide. The following field types are available:
Signature: the signer draws, auto-generates, or uploads their signature. Subsequent signature fields automatically reuse the first signature entered.
Initials: similar to signature, but for the signer’s initials.
Text: a single-line text input.
Multiline Text: a multi-line text area for longer content.
Checkbox: a tick box (e.g., for consent or approval).
Selection: a dropdown allowing the signer to choose one option from a predefined list.
Date: a date picker field.
To manage field types, go to .
Auto-fill from partner data
Each field type can be configured with an Auto-fill Partner Field that automatically
populates the field with data from the signer’s contact record (res.partner). For example,
setting the auto-fill field to email pre-fills the field with the signer’s email address.
Tip
To find the technical name of a contact field, enable developer mode and hover over the question mark icon next to the field on the contact form.
Note
Auto-filled values are suggestions only. The signer can modify them before completing the signature.
Field sizing
The size of fields can be adjusted by editing the Default Width and Default
Height. Both values are expressed as a percentage of the full page (decimal format), where 1
equals the full page width or height. For example, 0.150 means 15% of the page width.
Sign requests
A sign request represents a specific document sent to one or more signers for their signature. Go to to view all signing requests.
Creating a request
To create a new signing request:
From the dashboard, click Send on a template card. Alternatively, go to and click New.
Select the template to use.
In the send wizard, assign a contact to each role defined in the template.
Signing order
Choose how signers receive the document:
Parallel: all signers receive the document simultaneously and can sign in any order.
Sequential: signers receive the document one at a time, in the order you define. Each signer receives the document only after the previous one has completed their part.
For sequential signing, set the order number for each signer in the send wizard.
State machine
Every sign request follows a defined lifecycle:
Draft: the request has been created but not yet sent.
Sent: the request has been sent to the signers.
Signed: all signers have completed their signatures.
Refused: one or more signers refused to sign the document.
Canceled: the request was canceled by the creator.
Expired: the request’s expiry date has passed without all signatures being collected.
Note
Terminal states (Signed, Refused, Canceled, Expired) cannot be reversed. This ensures the integrity of the audit trail.
Two-factor authentication (2FA)
For additional security, you can require signers to verify their identity with a one-time password (OTP) before completing their signature.
To enable 2FA on a request:
In the send wizard, enable Require 2FA.
Select the verification method:
Email: a 6-digit code is sent to the signer’s email address.
SMS: a 6-digit code is sent via SMS to the signer’s mobile number.
Email & SMS: codes are sent via both channels; both must be verified.
The OTP code is valid for 10 minutes. The signer has 3 attempts to enter the correct code. After 3 failed attempts, a 15-minute lockout period is enforced before a new code can be requested.
Note
SMS verification requires SMS credits. You can purchase credits at under the SMS section.
Expiry date
Set an expiry date on a request to enforce a deadline. If all signatures are not collected by the expiry date, the request automatically moves to the Expired state. A scheduled action (cron job) runs periodically to check and expire overdue requests.
Reminders
Enable automatic reminders to nudge signers who have not yet completed their part. In the send wizard, set the Reminder Frequency (in days). The system sends periodic email reminders to pending signers at the specified interval.
Escalation
Set an Escalation Before Expiry value (in days) to notify the request creator a specified number of days before the expiry date. This gives the creator time to follow up with pending signers or extend the deadline.
Language selection
Select a Language on the request to control the language used in email notifications sent to signers. If the template uses the Template Copy per Language multilingual mode, the matching language copy of the template is used automatically.
Cancel and refuse
Cancel: the request creator can cancel a request at any time while it is in the Sent state. All pending signers are notified of the cancellation.
Refuse: any signer can refuse to sign. The request moves to the Refused state, and all participants (including the creator) are notified.
Signing portal
The signing portal is the public-facing interface where signers review and sign documents. It is
accessible at /sign/<token>, where <token> is a unique, secure access token generated for
each signer.
PDF viewer
The signing portal displays the PDF document with interactive fields highlighted for the current signer. Fields belonging to the signer’s role are editable; fields assigned to other roles are visible but read-only.
Signature capture
When the signer reaches a signature or initials field, they can:
Draw: use the mouse or a touchscreen to draw their signature.
Auto-generate: the system generates a signature based on the signer’s name.
Upload: upload an image file containing the signature.
If the signer has previously saved a signature on their partner record, it is offered as a quick-select option for reuse.
OTP verification step
If 2FA is enabled on the request, the signer is prompted to enter a one-time verification code before their signature is finalized. See Two-factor authentication (2FA) for details on the verification process.
Refuse option
Signers can refuse to sign by clicking Refuse to Sign. A notification is sent to the request creator and all other participants. The request moves to the Refused state.
Redirect after signing
If a Redirect URL is configured on the template, the signer is redirected to that URL after successfully completing their signature.
Terms & conditions
If the company has configured Terms & Conditions in the Sign settings, they are displayed to the signer before they finalize their signature. The signer must accept the terms to proceed.
Geolocation capture
With the signer’s consent, the portal captures the signer’s geographic location (latitude and longitude) at the time of signing. This data is recorded in the audit log as additional evidence of the signing event.
QR code
A QR code can be generated for a signing URL, allowing signers to quickly access the signing portal on a mobile device by scanning the code.
Portal — My Signatures
Signers who have an Odoo portal account can access a list of all their signing requests at
/my/sign.

The portal page displays:
Reference: the name of the signing request.
Status: the current state of the request (Sent, Signed, Refused, etc.).
Date: when the request was created.
Download: a link to download the completed signed PDF (available once fully signed).
Workflows
The workflow engine allows you to define complex signing and approval processes using a visual graph builder. Go to to manage workflows.
Creating a workflow
Click New to create a new workflow.
Enter a Name and optionally link a default Sign Template.
Click Open Builder to launch the visual workflow builder.
Node types
The following node types are available:
Start: the entry point of the workflow. Each workflow can have at most one Start node.
Signature: a signing step. Assign a role to define which signer must act at this step.
Approval: an approval step that does not require a signature but requires explicit approval from the assigned role.
Condition: a branching node that evaluates a condition and routes the workflow accordingly.
End: the terminal node. Each workflow can have at most one End node.
Transitions
Transitions connect nodes and define the flow of the process. Each transition can have:
A Label (e.g., Yes, No) displayed on the connection line.
A Condition expression used with Condition nodes to determine the path.
Condition evaluation
Condition nodes evaluate expressions based on:
Signer state: check whether a specific signer has completed or refused their part.
Field value comparison: compare the value entered in a specific field against an expected value.
When a signer completes their step, the workflow engine automatically advances to the next node based on the transition rules and condition evaluations.
Using a workflow on a request
When creating a signing request, select a Workflow to govern the process. The request follows the workflow graph instead of simple parallel or sequential signing. The Current Node field on the request shows which step is currently active.
Bulk send
Send the same template to multiple recipients at once using the bulk send feature.
To perform a bulk send:
Go to , select a template, and click Bulk Send.
In the wizard, add recipients by:
Selecting contacts from the database.
Importing a CSV file with contact information.
Review the list and click Send All.
A separate signing request is created for each recipient. You can track the progress of all requests from the bulk send record. The bulk send view shows:
Total number of requests created.
How many have been signed, are pending, or have been refused.
Webhooks
Webhooks allow you to notify external systems when signing events occur. Go to to configure webhook endpoints.
Configuration
Create a new webhook with the following settings:
Name: a descriptive name for this webhook.
URL: the endpoint URL to which event payloads are delivered.
Secret Key: a shared secret used to sign payloads with HMAC-SHA256. The receiving system should verify the signature to ensure payload integrity.
Events: select one or more events to subscribe to.
Available events
Event |
Description |
|---|---|
|
A signing request has been sent to its signers. |
|
An individual signer has completed their part. |
|
All signers have signed; the request is fully completed. |
|
A signer has refused to sign the document. |
|
The request has expired past its expiry date. |
|
The request has been canceled by its creator. |
Payload signing
Each webhook delivery includes an X-Sign-Signature HTTP header containing an HMAC-SHA256
signature of the JSON payload, computed using the webhook’s secret key. The receiving system should
compute the same HMAC and compare it to the header value to verify authenticity.
Retry mechanism
If a webhook delivery fails (non-2xx HTTP response), the system retries up to 3 times with exponential backoff (2, 4, and 8 seconds between retries). Each delivery attempt is recorded in the delivery log with the HTTP status code.
SSRF protection
Webhook URLs are validated to prevent Server-Side Request Forgery (SSRF) attacks. URLs targeting
private or internal network addresses (localhost, 127.0.0.1, 10.x.x.x,
192.168.x.x, etc.) are blocked.
REST API
eYssen Sign provides a RESTful API for programmatic access to signing operations. All endpoints
are under the /api/v1/sign/ path.
Authentication
API requests must be authenticated using one of the following methods:
Odoo session: standard session cookie obtained after logging in via
/web/session/authenticate.API key: pass the key in the
Authorizationheader asBearer <api_key>.
Endpoints
Create a signing request
POST /api/v1/sign/requests
Request body (JSON):
{
  "template_id": 5,
  "reference": "Contract #1234",
  "signers": [
    {"role_id": 1, "partner_id": 10},
    {"role_id": 2, "partner_id": 15}
  ],
  "sign_order": "sequential",
  "expiry_date": "2026-04-30"
}
Response: 201 Created with the request ID and access tokens.
Get request status
GET /api/v1/sign/requests/<id>
Response: 200 OK with the request details including state, signers, and their individual
statuses.
Download signed document
GET /api/v1/sign/requests/<id>/document
Response: 200 OK with the signed PDF as a binary download (available only when the request
is in the Signed state).
List requests
GET /api/v1/sign/requests?state=signed&limit=20&offset=0
Query parameters:
state: filter by request state (draft,sent,signed,refused,canceled,expired).limit: maximum number of results (default: 20).offset: number of results to skip (default: 0).
Response: 200 OK with a paginated list of sign requests.
Audit & verification
eYssen Sign maintains an immutable, hash-chained audit trail for every signing request, providing strong evidence of document integrity and the signing process.
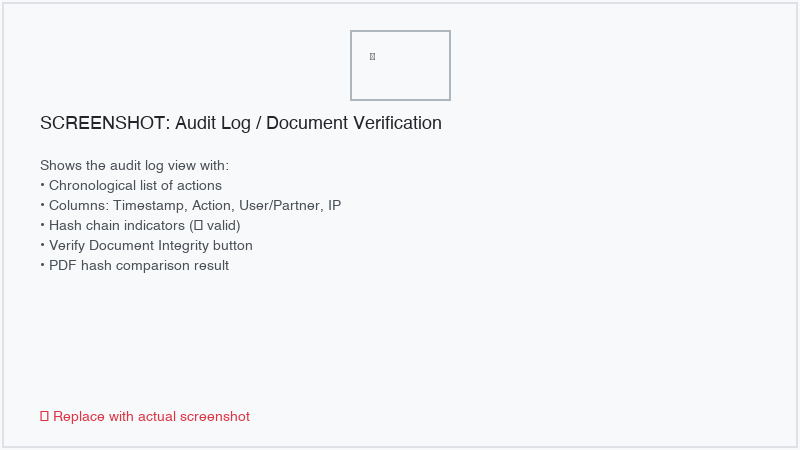
Hash-chained audit trail
Every action on a signing request creates an audit log entry. Each entry contains:
Action: the type of event (e.g.,
created,sent,opened,signer_completed,signer_refused,expired,canceled).Timestamp: the server-side timestamp of the action (never client-supplied).
User / Partner: the user or partner who performed the action.
IP address: the IP address from which the action was performed.
User agent: the browser or client identification string.
Geolocation: latitude and longitude (if captured during signing).
Previous hash: the hash of the preceding log entry.
Current hash: the HMAC-SHA256 hash of this entry, computed using the previous hash and a server-side secret.
The hash chain ensures that any tampering with or deletion of log entries is detectable. Each new entry cryptographically links to the previous one, forming an unbreakable chain.
Important
Audit log entries are immutable. Any attempt to modify or delete a log entry raises an error. This guarantees the integrity of the audit trail.
Document verification
eYssen Sign provides two levels of document verification:
Hash chain verification: verifies that the entire audit log chain is intact by recomputing each entry’s hash and comparing it to the stored value.
PDF SHA-256 comparison: computes the SHA-256 hash of the completed signed PDF and compares it to the hash recorded at the time of signing. Any modification to the PDF after signing is detected.
To verify a document, open the signing request and click Verify Document. The system reports whether the hash chain and document hash are valid.
Audit report
An audit report can be generated for any completed signing request. The report includes the complete audit trail, signer information, timestamps, IP addresses, and the document hash. This report can be downloaded as a PDF and serves as supporting evidence of the signing process.
Integrations
eYssen Sign integrates with other Odoo modules to streamline document-centric business processes.
Sale orders
Link a signing request to a sale order. When the document is fully signed:
The sale order is automatically confirmed.
The signed PDF is attached to the sale order record.
To link a request to a sale order, select the Sale Order field on the request form or create a signing request directly from a sale order.
Invoices
Link a signing request to a customer invoice (account.move). When the document is fully signed:
The invoice is automatically posted.
The signed PDF is attached to the invoice record.
To link a request to an invoice, select the Invoice field on the request form.
HR employees
Link a signing request to an employee record. When the document is fully signed, the signed PDF is attached to the employee record. This is useful for employment contracts, onboarding documents, and HR policies.
To link a request to an employee, select the Employee field on the request form. You can also access an employee’s signed documents directly from the employee form view.
Settings
Configure eYssen Sign at .
Company Terms & Conditions
Define the Terms & Conditions text that is displayed to signers before they finalize their signature. The Terms & Conditions are configured per company using a rich-text (HTML) editor.
Default 2FA settings
Set the default two-factor authentication method for new signing requests. This default can be overridden on individual requests.
SMS credits
If you use SMS-based 2FA verification, you need SMS credits. Click Buy Credits to purchase additional credits.
Template access control
Control who can create, edit, and use templates:
Sign User: can use templates to create and send signing requests. Can view their own requests and requests where they are a signer or follower.
Sign Manager: full access to all templates, requests, and configuration. Can manage roles, field types, workflows, webhooks, and settings.
Security
eYssen Sign implements multiple layers of security:
Role-based access: the Sign User and Sign Manager groups control access levels. Users can only see requests they created, are assigned to sign, or are following.
Record rules: enforce row-level security so users cannot access requests belonging to others unless they are a participant.
Rate limiting: the shared signing endpoint implements rate limiting to prevent abuse.
SSRF protection: webhook URLs are validated to block requests to private or internal network addresses.
XSS protection: chatter messages and user-supplied content are sanitized to prevent cross-site scripting attacks.
State machine enforcement: terminal states (Signed, Refused, Canceled, Expired) cannot be reversed, preventing unauthorized state manipulation.